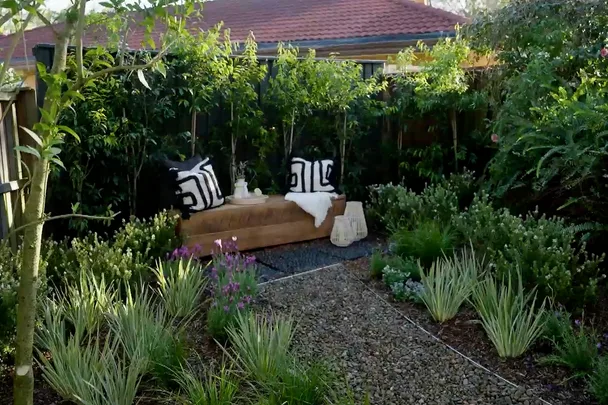
Pebbles are a popular choice for garden path landscaping, due to their variety of colours and sizes, plus their low maintenance needs. Use as a textured material to create a tiled pebble pad, or a curved pebble path with defined garden edges.
1. How to create a tiled pebble pad
Gather your supplies
- 600 x 600mm floor tile
- External perforated corner bead 2.4m
- Paper packing tape
- Quick-set mortar mix 20kg (6)
- Black pebbles 15kg (9)
- Davco Sanitized Colorgrout in Black 1.5kg (2)
You’ll also need
- Tape measure
- Aviation snips
- Buckets
- Drill and rotary mixer bit
- Pointing and rendering trowels
- Gloves
- Sponge
- Scrubbing brush
- Shovel
- Level
- Mallet
Step 1
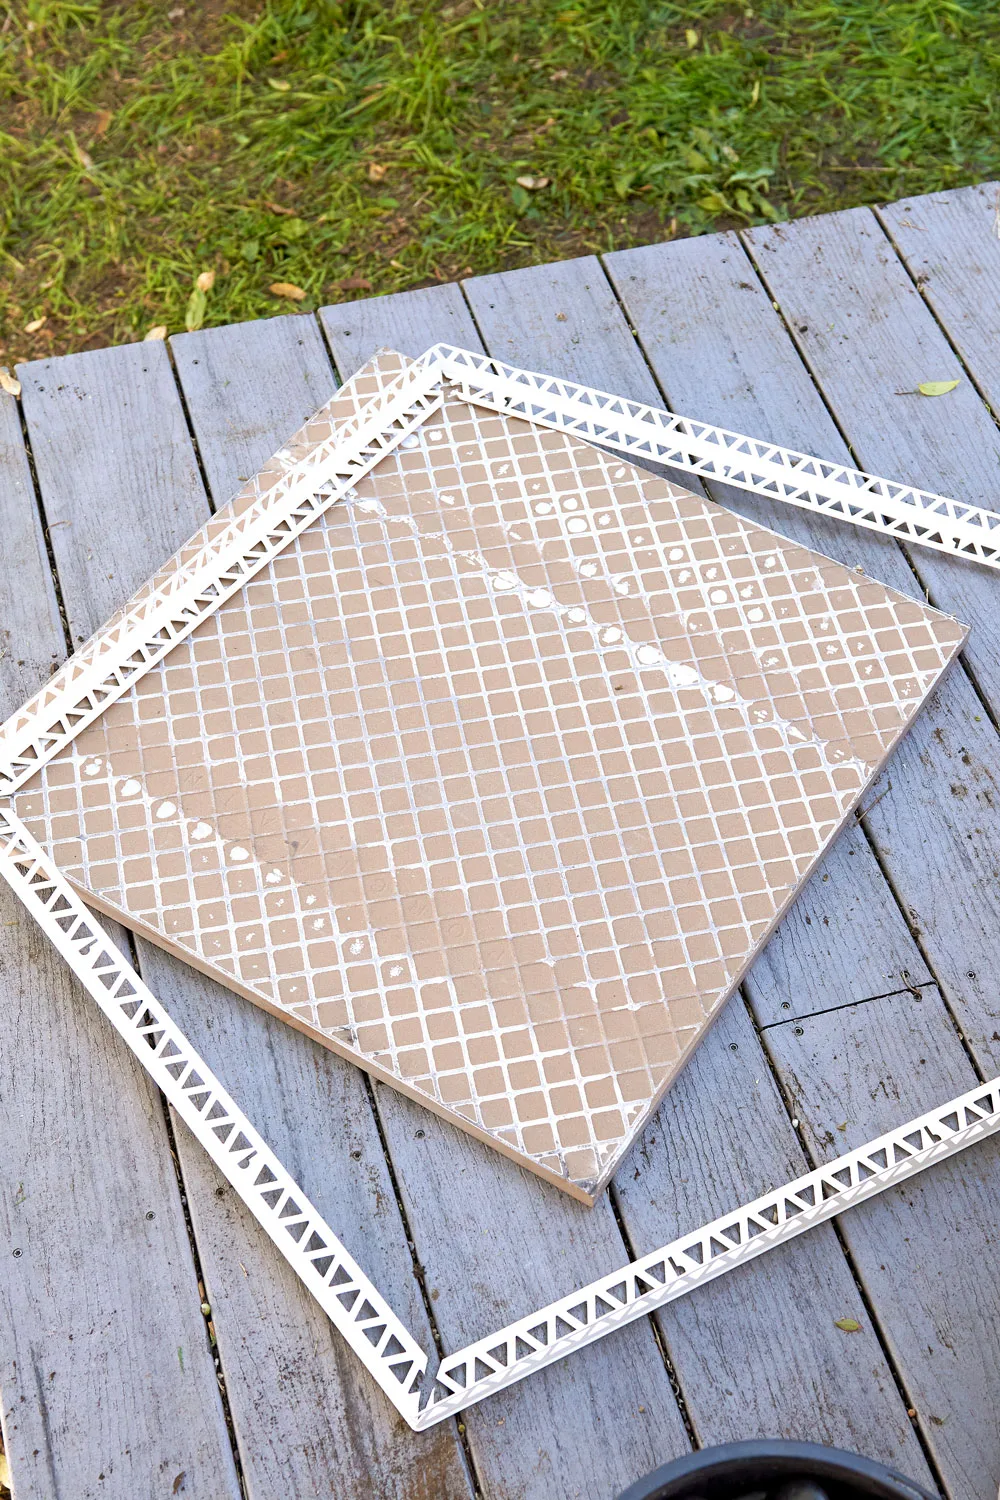
To create a mould for your tiles, use snips to cut corner bead into 4 x 600mm pieces. Cut all corner bead edges into a 45-degree mitre, then assemble along the edges of the tile into a frame shape. Apply tape around corner bead frame to secure.
Step 2
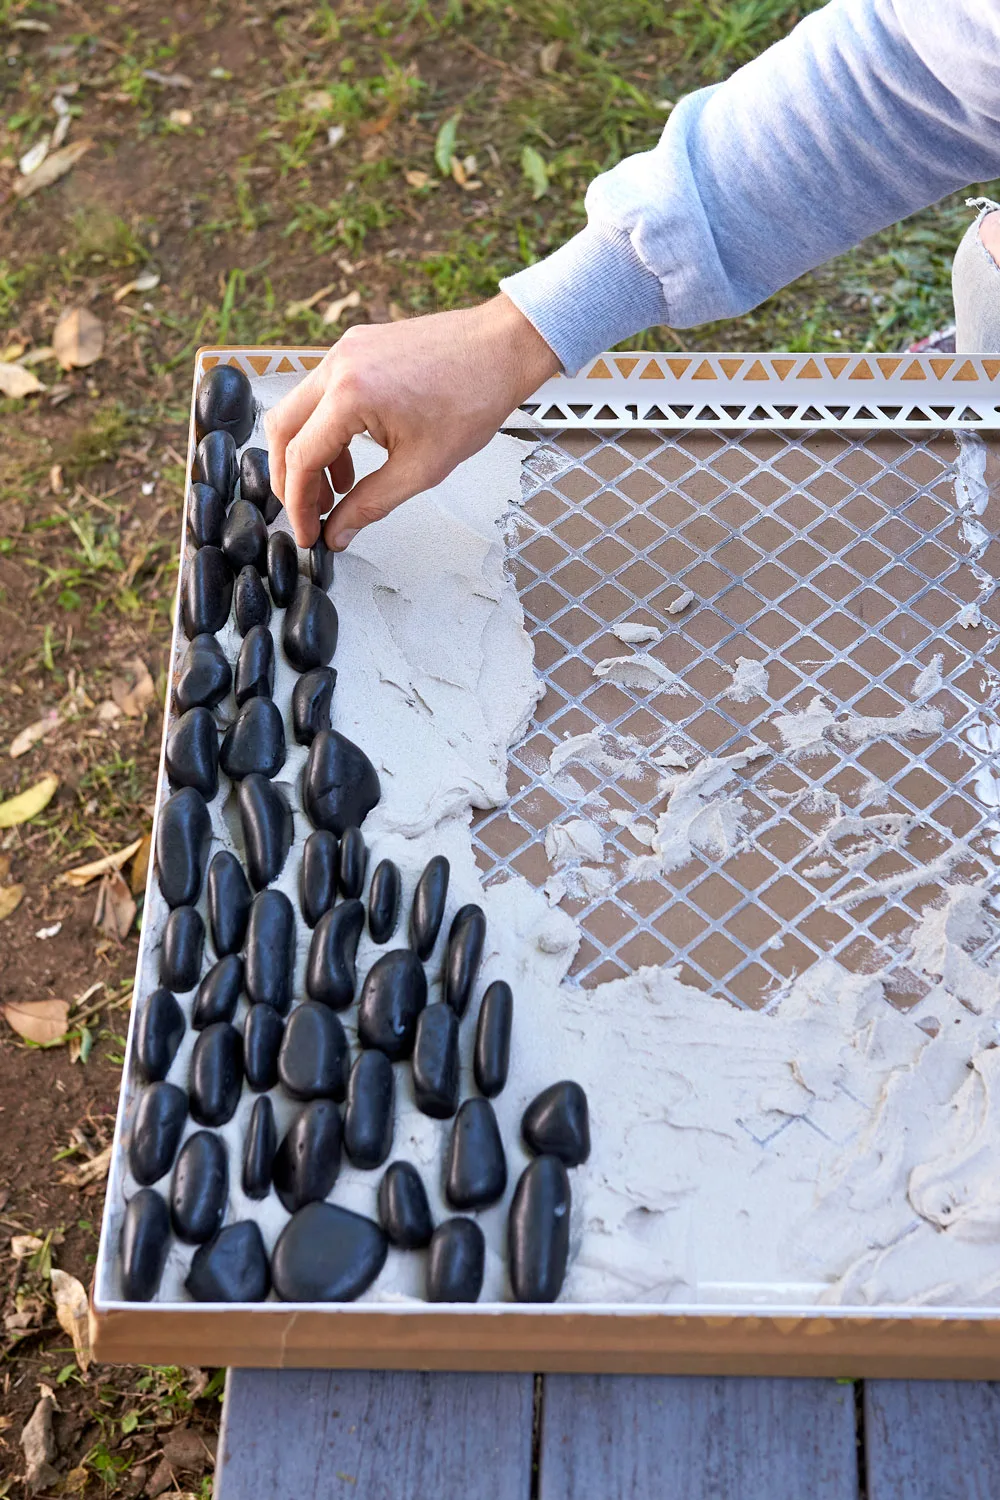
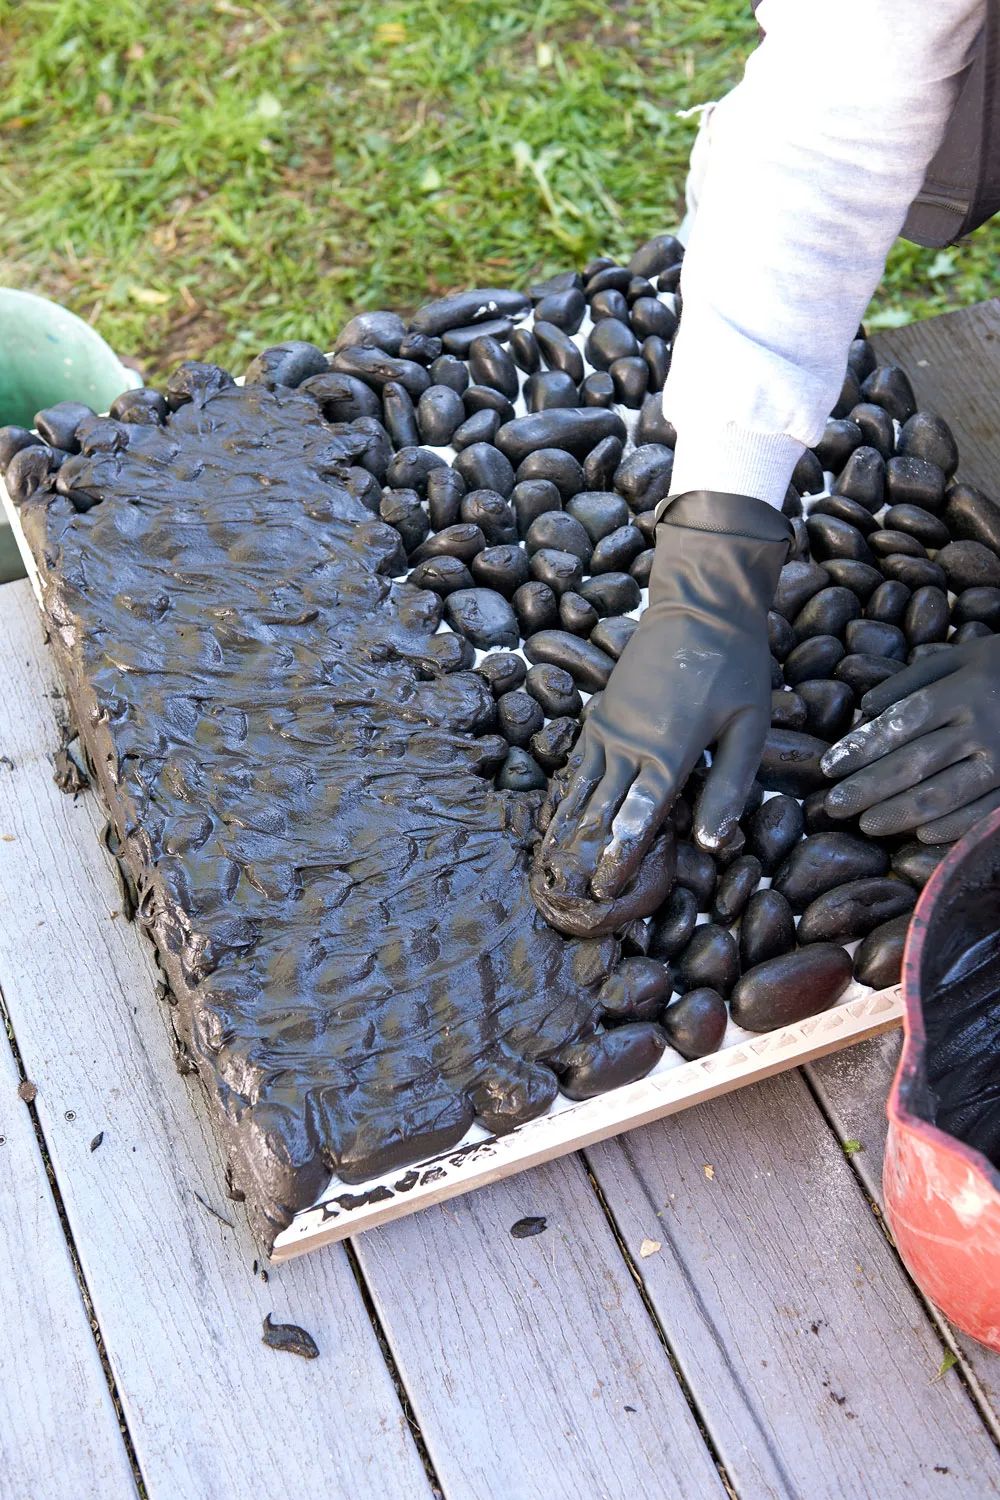
In a bucket, mix quick-set mortar mix with water, drill and rotary mixer bit according to instructions on bag. Use pointing and rendering trowels to apply mortar mix into tile mould, around 15mm depth. When mould is a quarter filled, push pebbles into mix so they’re densely packed and half exposed. Work quickly, one section at a time, until mould is full. Allow mortar to set.
Step 3
Mix up grout in a bucket with water according to instructions on bag. Put on gloves. Scoop and apply mix to top of the pebbles. Ensure all corners are filled, then smooth out with your hand.
Step 4
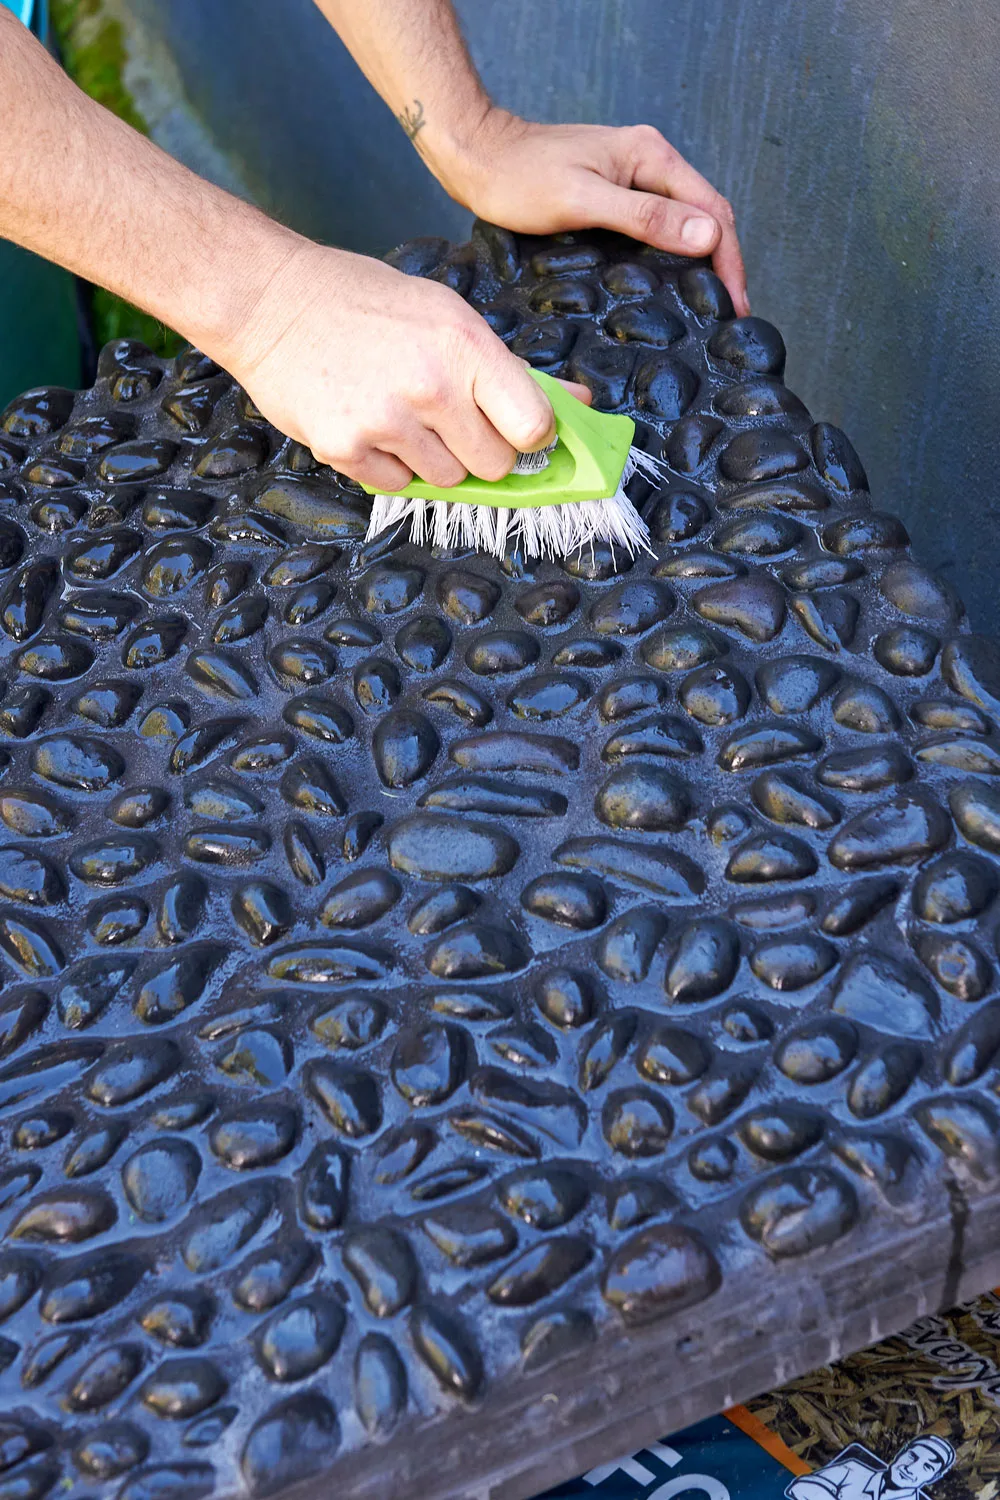
Use a damp sponge to polish and even out grout around the pebbles. Allow to set. With a scrubbing brush and water, scrub away excess grout to create a shiny pebble tile. Remove from mould, then repeat Steps 2-4 for 3 pebble tiles in total.
Step 5
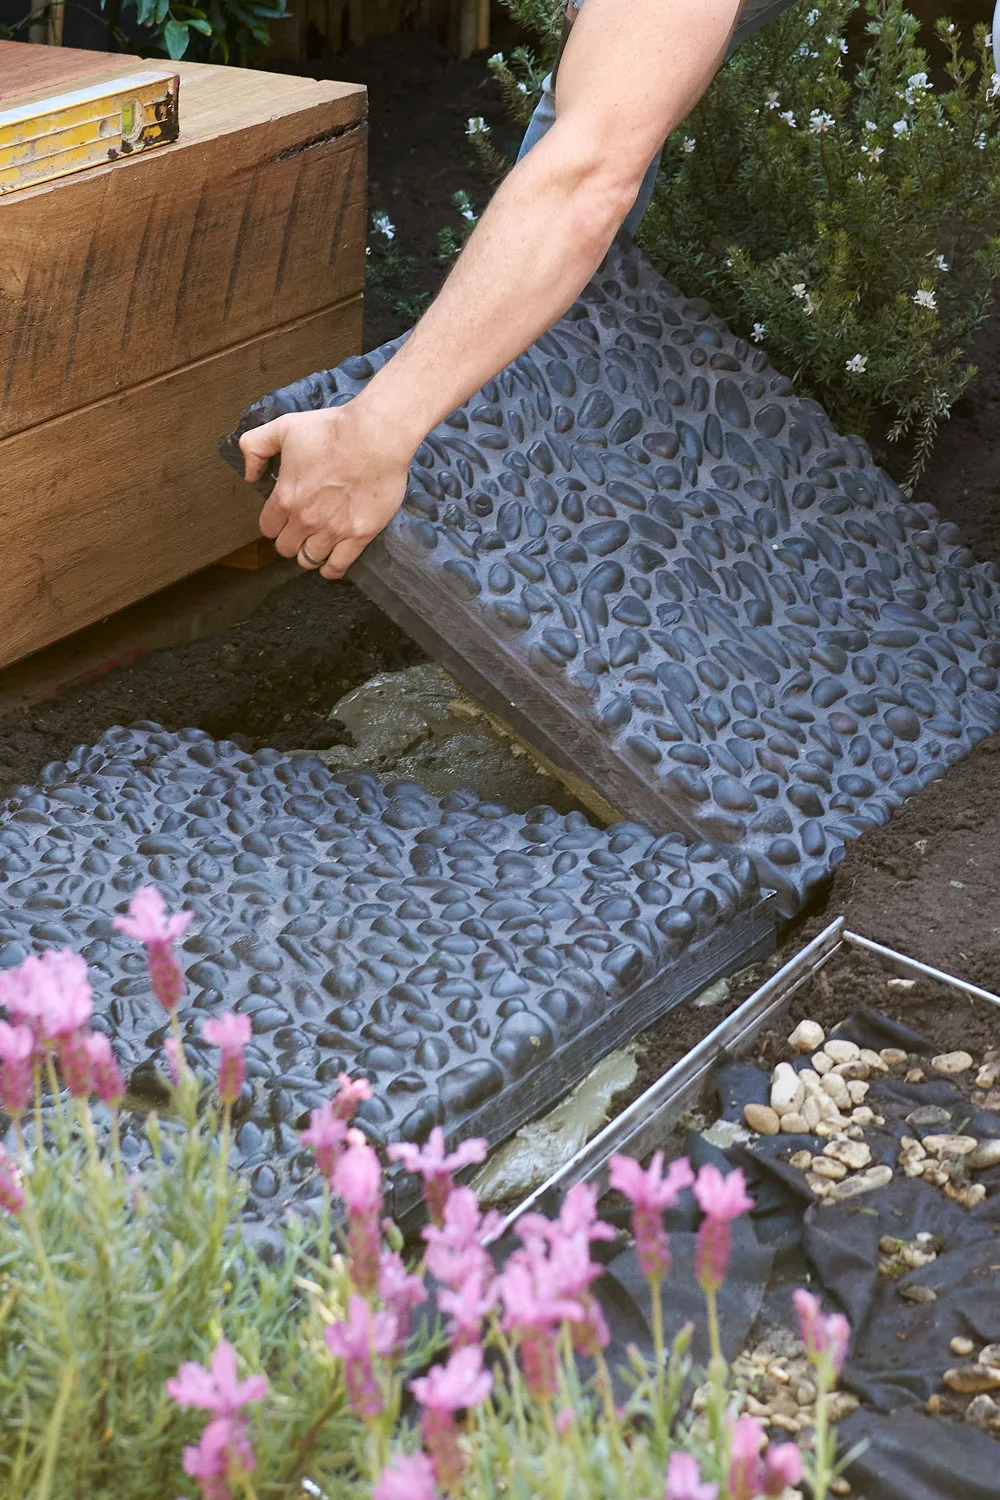
To prepare the area for the pebble pad, use a shovel and level to clear, dig and level out to 30mm depth. Mix mortar mix then apply
to area. Lay 3 pebble tiles over mortar to create a pebble pad. Use a mallet and level to adjust tiles until they’re level and square.
How to lay a curved pebble path
Gather your supplies:
- Landscape chalk
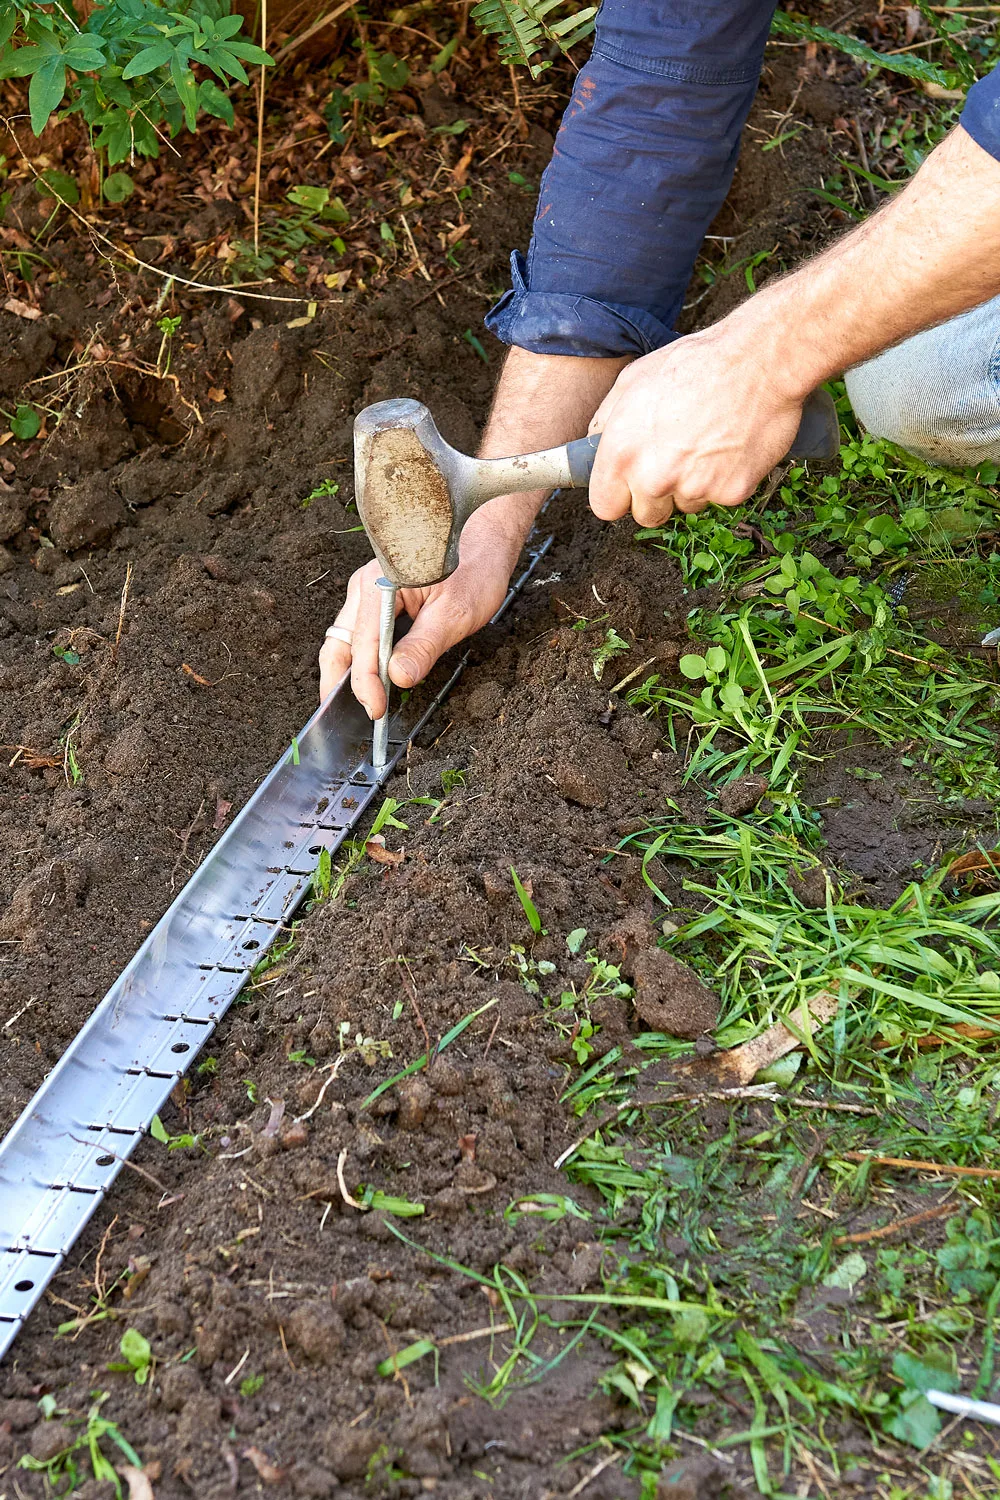
- 50mm curved aluminium garden edging, spikes and connectors
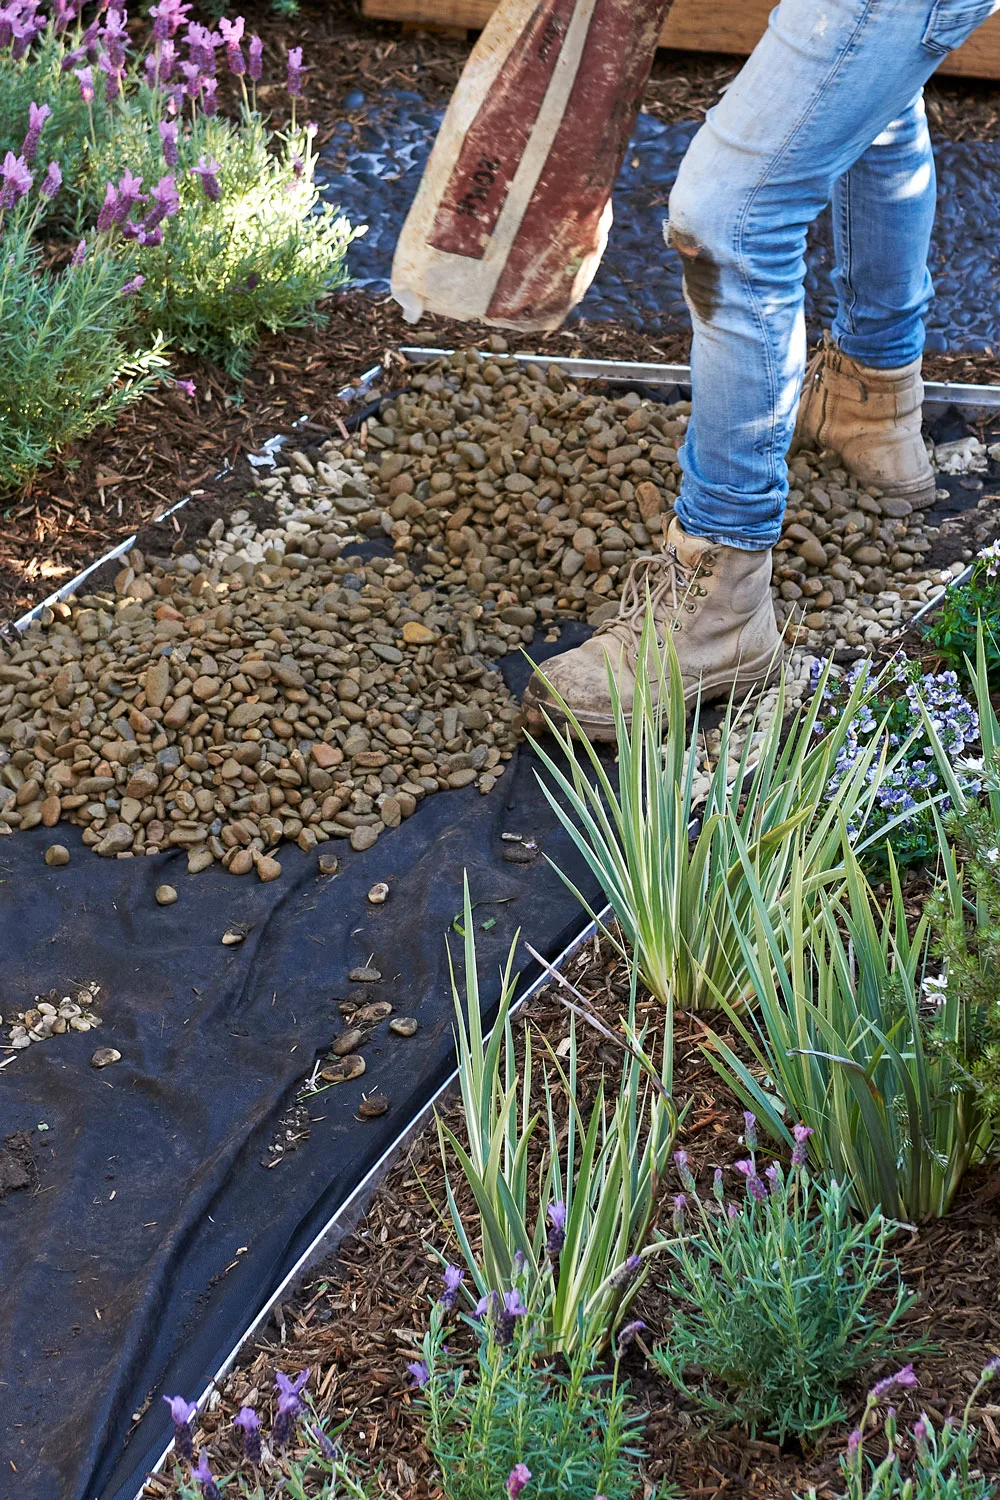
- Road base
- River pebbles 20-40mm
You’ll also need:
- Pickaxe
- Shovel
- Tape measure
- Mallet
- Level
- Metal rake
- Scissors or craft knife
Step 1
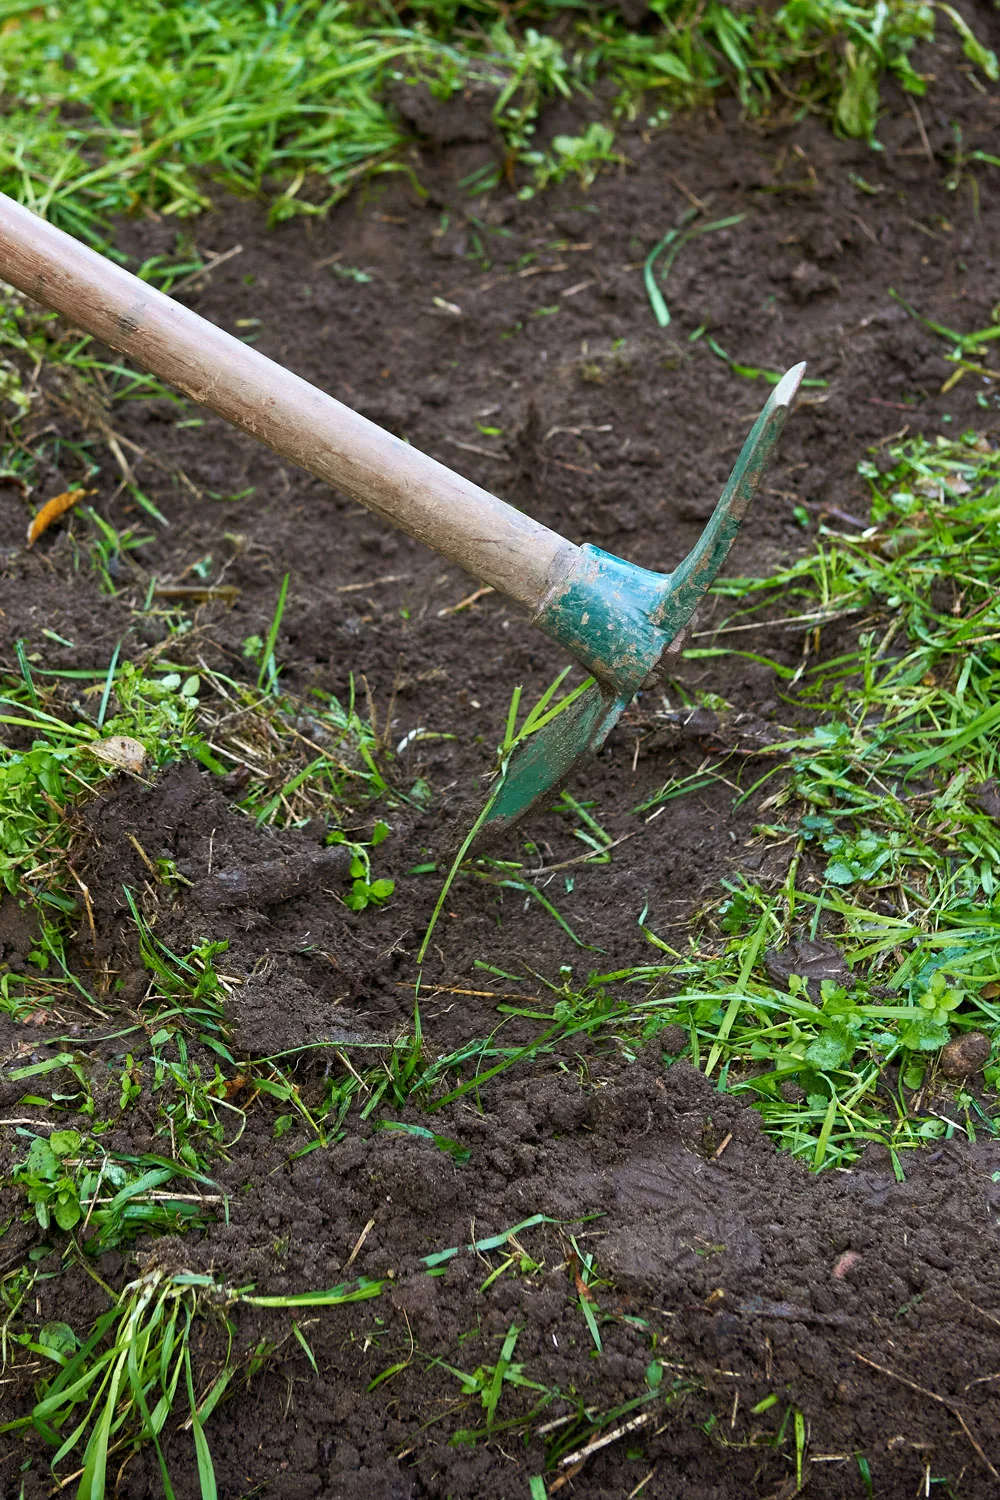
Measure and mark a 950mm-wide path to your desired length with tape measure and chalk. Use a pickaxe to remove the lawn.
Step 2
Install edging along chalk line with mallet and spikes.
Step 3
Excavate down 70mm from edge height with shovel, then rake until level.
Step 4
Spread an even 40mm layer of road base to path with shovel, then tamp down and level with rake head.
Step 5
Lay shade cloth over road base. Trim to fit.
Step 6
Cover shade cloth with pebbles, spread with rake so pebbles are flush with edging.
You might also like:
Related stories

Native ad body.

Native ad body.
Lawn envy is real, here’s how to have the best on the block


Native ad body.